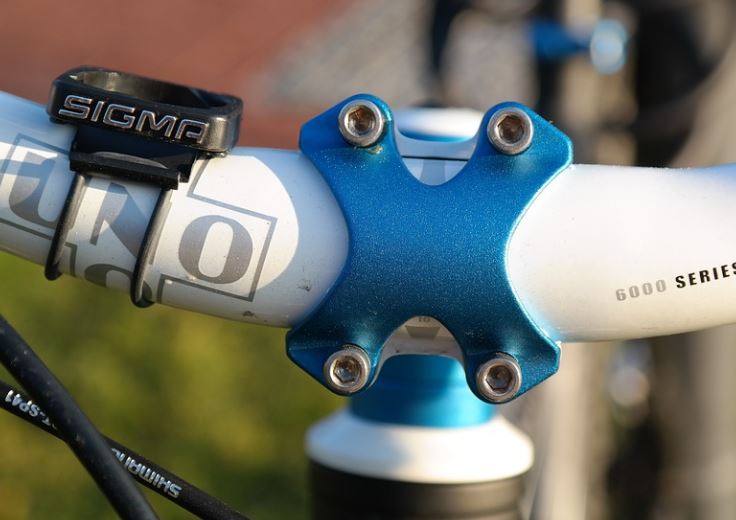
A crankset on a bike is one of a bicycle’s most crucial components, which is also known as the chainset. It is at the core of the drivetrain and contributes to what makes a bike by being one of the essential elements that help the chain move as you pedal. Continue reading, you will learn how to remove and fit cranksets.
Table of Contents
What is a Crankset?
Simply put, the crankset is the part of your bike that you pedal to move both you and the bike forward. While crankset or simply “cranks” are still frequently used terms, they are more commonly used in North America and the UK. In North America, it is commonly known as a crankset.
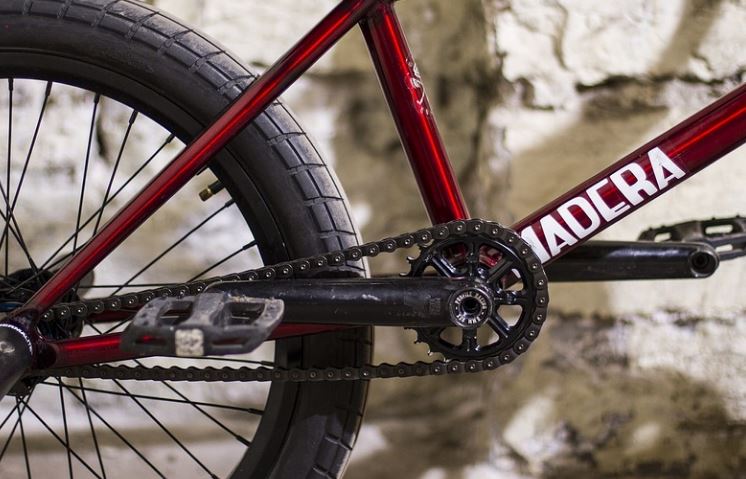
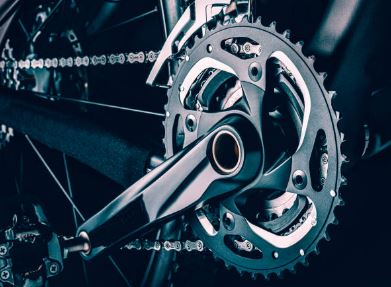
The two crank arms that the pedals are attached to and one to three chainrings for the chain to run over make up the crankset.
Additionally, the middle component—the axle or spindle—that joins the two sides is frequently included in contemporary designs. The axle is a component of the bottom bracket in conventional cranksets, which is the bearing assembly that attaches the cranks to the bike’s frame.
Your crankset should provide you with a wide enough range of gears to choose one appropriate for the terrain you’re riding on in combination with your rear gearing, which is typically provided by a rear derailleur and a cassette with multiple sprockets.
The crankset is one of those bike parts that appear straightforward but conceals its complexity in the plethora of options, standards, and compatibility issues.
What Are Cranks Made From?
Cranks can be made from a range of materials:
- Steel
- Carbon Fibre
- Aluminum
How Many Crankset Sizes?
The number of gears you need will determine which crankset you should use. Generally speaking, there are three types.
- Single – A crankset with a single ring has just one chainring. This technology has been widely adopted by the mountain biking community. By using a cassette with a wider range, the single chainring compensates for the loss of the smaller, inner ring. As a result, there are fewer moving parts, fewer places for mud to collect, and a lower chance of the chain coming off when riding off-road.
- Double – the configuration that is most frequently seen on a road bike. Riders are able to maintain a constant cadence (pedaling speed) thanks to the double crankset’s wider range of gears with small steps between them. These come in a variety of sizes based on the rider’s fitness level and the type of road riding.
- Triple: An older design of chainset that is typically found on vintage, touring, or more affordable bikes. It offers a very broad range of gears but also adds weight because of the third chainring. Beginners will benefit from the additional support they’ll receive from the “granny ring” (the smallest ring) on challenging climbs.
What is Crankset Compatibility?
Your crankset’s chainrings can be changed, but not every chainring will fit every crank.
To begin with, different cranksets may differ in the number of arms or direct-mount interfaces (joining the cranks to the chainrings) as well as in how they are arranged.
Road cranksets from Shimano frequently have four arms, but they are not all distributed equally around the spindle.
SRAM’s 11-speed road bike cranksets, in contrast, have five evenly spaced arms and one chainring bolt that screws into the rear side of the crank arm.

How Do I Know What Crankset I Need?
A key consideration when upgrading or replacing crank arms or cranksets is crank length. Riders with legs that are shorter or longer than average may feel more comfortable on cranks that are more appropriate for their measurements. The majority of cranks for road and MTB use are supplied in lengths between 170 and 175mm.
It might be worthwhile to find out what crank length is suggested for your inside leg measurement since options between 160mm and 180mm cover a range of limb lengths. Notably, some MTB riders will choose a shorter crank to increase ground clearance, particularly in more gravity-oriented sports like downhill racing.
When Should a Crankset Be Replaced?
In many cases, cranks shouldn’t need to be replaced unless they are damaged, crashed, or neglected; however, to keep them in good condition, parts like chains should be replaced before they wear out and cause damage.
Depending on your riding style, you should replace your chain every 2,000 to 3,000 miles. However, using a chain wear indicator, which measures how much your chain has stretched, is the best way to figure out if you need a new one.
You need a new crankset if your crank is starting to make noise while you’re riding or otherwise shows signs of wear. Using a damaged one will not only result in accidents but more damage as well.
How to Remove a Crankset?
You must remove your cranks if you want to install a new bottom bracket or replace worn-out chainrings. You can take the simple task of removing your crankset to your neighborhood bike shop or do it yourself. If you are looking to do it yourself, here are a few steps to removing your crankset:
- Loosen the non-drive side crank bolts: The bolts holding the left-hand (non-drive) side crank off the crank spindle can be loosened up using a 4mm Allen key.
- Remove the adjustment cap: The spindle and bottom bracket are protected on Shimano cranks by a special cap. Place the smaller ring inside the crank arm and unscrew it using the bottom bracket tool.
- Remove the crankset: it should be simple to remove the left-hand (non-drive) crank from the spindle. You should be able to remove the bottom bracket and then remove the right-hand (drive) crank from the frame, complete with the spindle attached.
How to Fit New Cranks to Your Bike?
The equipment and supplies you will need to finish the project are listed, along with in some cases where you can purchase them.
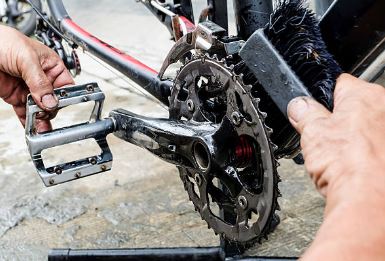
Keep it clean.
Maintaining a clean bottom bracket is good form. Threaded cups make this very simple because they can be repeatedly screwed in and out. Press-fit cups make it harder because they generally don’t like to be put on and taken off more than once or twice. Degrease, dry, and re-grease after wiping away any moisture.
Grease the threads. Grease the threads by circling them. Grease is good, so don’t be afraid to use it.
the bottom bracket’s bearings. Different threads on screw-fit bottom bracket cups allow them to only fit into particular frame sides. In this picture, you can see that they are labeled “Drive side” and “Non-Drive side,” along with an arrow indicating which way it should be turned to tighten it.
Grease the threads. It’s a good idea to lightly grease screw-fit cups as well. Even though you’ve also greased the bottom bracket shell’s threads, it’s still good practice. The bearing housing is marked with the suggested torque setting of 25 to 30 ft-lbs.
Spacers. The width of the bottom bracket shell can be effectively increased by spacing the external bottom bracket cups apart from the frame. With no modifications, our SRAM Force crank fits a 68mm bottom bracket shell perfectly. To determine how many (if any) and which side you need, consult the information provided by the manufacturer of your crankset.
Place the drive-side cup. To find where the first threads are engaged, place the right-hand cup on the frame and drive it into place. They should turn relatively easily with a clean engagement.
Tighten the cup. An appropriate bottom bracket tool will be required to complete the final turns and tightening. This Park Tools full contact ring is of that type. It is more difficult for the tool to slough off and harm the cup splines because of the full ring fit.
Place the cup on the opposite side of where you are driving. Fit the left and cup exactly the same. Remember that it screws in anti-clockwise which will feel quite off if you’ve got any sort of muscle memory from screwing threaded parts together.
Fit the crank. To the drive side bottom bracket cup, present the crank. Carefully insert the axle end into the open seal while being careful not to damage the hard rubber edge, which could reduce the bottom bracket’s ability to prevent water infiltration.
the axle coming around the other way. Slide the axle through the bottom bracket cups. If you installed the left-hand cup while leaving the dust seal in place, it won’t surprise you if it pops out when the axle goes through. Pick it up, clean it, and then replace it. In order to accommodate the crank splines, the seal has castellations on its inside edge. Set those in place, then raise it over the stub as shown. Over the bearing, it ought to fit perfectly.
Insert the crank by pushing it. The last portion of the axle is a tight fit into the drive side bearing, so the crank is unlikely to fit tightly right up into the right-hand cup if you just push it in. Use the heel of your palm to strike the drive side crank’s center forcefully. It should be largely there after doing this. Once the left-hand crank arm is tightened, the last millimeter or so will be drawn through.
Fit the other crank. Now that the dust seal is in place, you can install the left-hand crank because the axle is sticking out of the left-hand cup. The female splines on the crank arm match the male ones on the axle stub. These will come pre-greased on a new crank; you can see it here in the yellowy substance in the splines. When reassembling a used crank arm, clean the splines and apply some new grease.
Verify the alignment of the crank. Unless you’re trying out for the circus, place the left-hand crank 180 degrees away from the right-hand crank. Due to the attachment bolt’s potential to prevent clean engagement, the left-hand crank must be gently eased onto the splines.
The fixation bolt should be tightened. When you can feel the splines engaging, tighten the crank arm to 12–15 Nm (106–133 in-lbs) using an 8mm Allen wrench. You’ll essentially be tightening it until you feel it come to a stop.
Check the bearings. The crankset is fitted once the left-hand crank arm is fully tightened. If everything has been installed correctly, you should be able to spin the cranks with your finger and they should spin freely.
What is a Boost Hub and Does It Affect My Crankset?
Boost hubs have become more common on many mountain bikes in more recent years. The benefits of a boost hub and wider axle standard are that the wheel’s stiffness and stability are greatly increased due to the wider hub flange and stronger spoke-bracing angle.
To ensure that you continue to achieve the ideal chain line in light of this new technology, cranksets had to be modified. Whether or not your crankset has a boost hub should be verified before making a change.
What Does a Crankset Do on a Bike?
The crankset is, quite simply, the part of your bike that you pedal to move you and the bike forward. Although cranksets or simply “cranks” are still commonly used, the term “chainset” is more frequently used in the UK than it is in North America.
Where is the Crankset on a Bike?
A lot of parts come together to make a bicycle. The crankset, which includes all of the parts between the two pedals, is the bike’s transmission, so to speak. It uses the power from your legs to move the pedals, the chain, and ultimately the rear wheel.
Will Any Crankset Fit on My Bike
No, cranks are not typically interchangeable, but you can probably use the crank from the damaged bike. First, does the rear cluster of each bike have six, seven, or eight sprockets? They would use the same chain width and chainring spacing if this were the case.
How Much Does a New Crankset Cost?
A good, basic crankset can cost around $100.
Conclusion
The transmission crankset on a bike. If you intend to properly maintain and service your bike yourself, being able to install and remove them is a very useful skill.
Make sure your crankset is clean by giving it a once-over. Your bike’s performance may be impacted by the quick accumulation of dirt and grime. You don’t need to lubricate the area or regrease the bearings because the majority of contemporary crankset systems use sealed bearings. After every ride, simply wash the bike. Be careful not to spray water onto the bearing area, though. Never employ a power sprayer, either.